
3️⃣How To Use Valhalla?
Once you have added Valhalla to your chart, you can start unleashing its power.
Click on the "Settings" icon right next to the indicator name to bring up the configuration panel.

From here you will find 3 different sections:
Strategy

This is where you will find all of the Valhalla Custom Optimized Strategies for specific assets.
Choose the one that you wish to use. (Keep in mind that this will change the results generated by Valhalla)
Always make sure to choose the specific asset & timeframe that the strategy was created for.
Example:
BTCUSDTPERP - Binance | 15min

Visual Inputs

Info Panel Type: Change between Statistics/Helper Panel/Off
Info Panel Size: Change between Regular/Small
Theme: Change between Default/Classic
General Settings

Use the opposite signal as Stop-Loss: When this function is disabled it will switch to the set stop loss from the strategy instead of closing the trade only by the opposite signal.
While this function can lead to more volume of trades, always double check to see which option gives better accuracy and adjust according to your own trading style and strategy.
Accuracy & Statistics
You will be able to view the Statistics panel in your chart as follows:

You will find useful info regarding the accuracy of the different Take Profit Levels from the latest signals.
The profit table is meant to illustrate the results of entering and exiting the 100% of the position on a specific TP. The total profit including the stop-losses is displayed in the Net Profit row.
Helper Panel
The helper panel will show you all of the info you need to know regarding the current & next trade Entries, Take Profit Levels, Stop-Loss and optional Averaging Levels.

Entering Trades
By default, Valhalla will load up with the "Use the opposite signal as Stop Loss" enabled, this means that there will always be an active trade, such as follows:
When this function is disabled, there will be times when there wont be any active trade, the details of the most probable position will show in the helper panel.
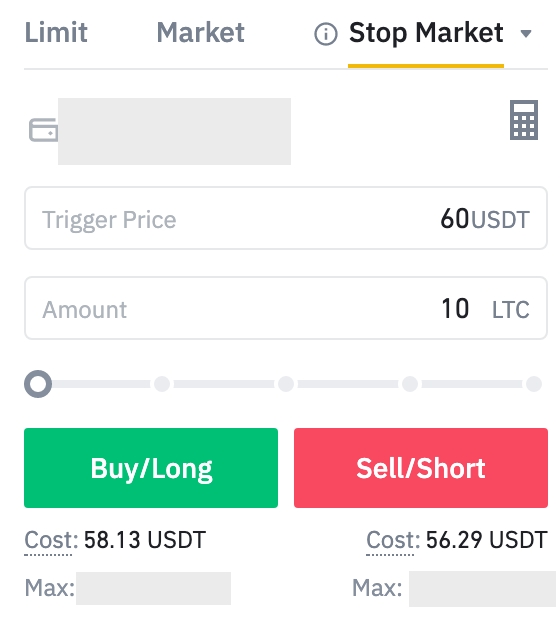
If you are ready to prepare your trade ahead of time, go ahead and set your pending market stop order (using Stop Market) at the indicated entry price in advance.
For example, if you want to enter a long position at 60$ (current price - let's say 56$), set the trigger price to $60 and press the Buy/Long option depending on your strategy.
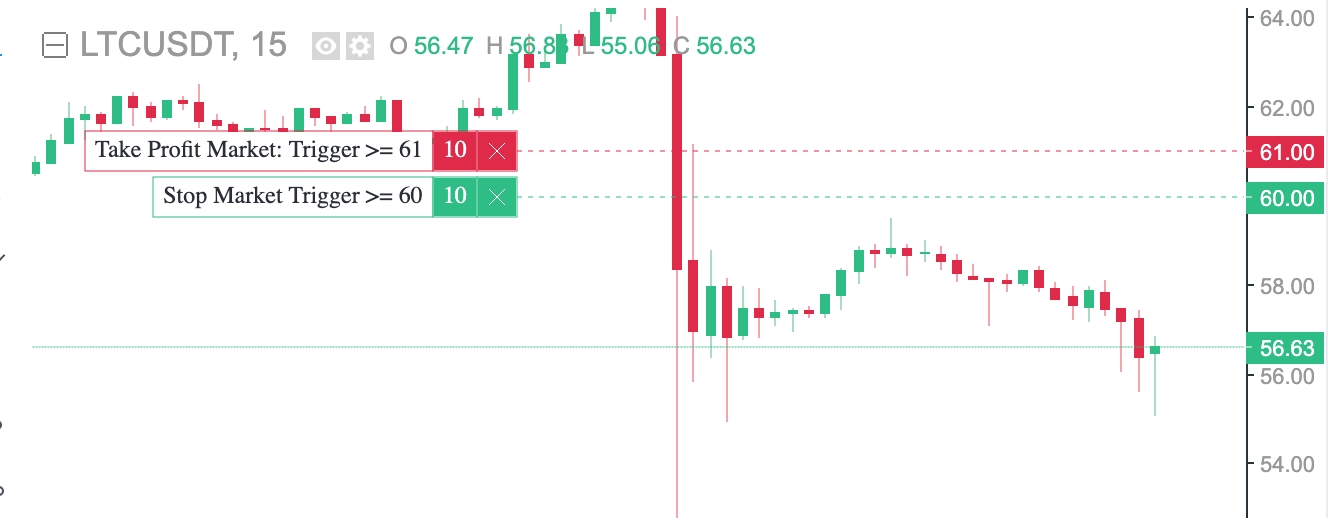
You can also set a take-profit in advance (using Regular Limit order). For instance, set trigger price to 61$, and press Sell/Short.
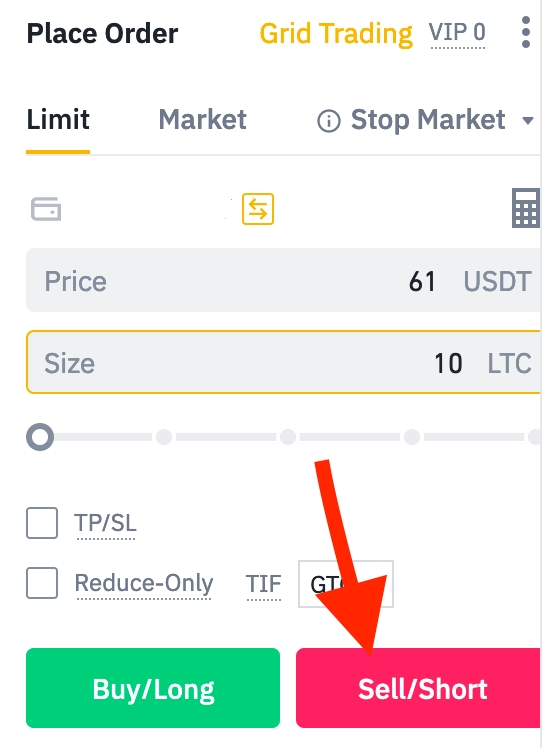
All set by now!
Take Profit Levels
The Take Profit Levels will be shown in the chart as the green lines during a trade.

This values will be shown in the Helper Panel for the current and next trade respectively:

You can also view which TP's of the current trade have been hit, a green checkmark will appear.
And also the strategy % values of the TP/SL are displayed. (Shown without consideing Leverage)
Take Profit Strategies
Close the position in parts, for example: 50% on TP2 and 50% on TP 3-4.
Close the whole position on a specific target, for example: 100% on TP4. (Our Favorite Strategy)
After reaching a certain target (TP4 for example), move the SL below the entry price and move it higher and higher as the profit grows.
Our Favorite Strategy for Crypto:
3-5% of capital per trade
10x Leverage Cross
100% Take profit on TP4
No more than 5-6 trades open at the same time
Longs + shorts following the trend
SL: Opposite Signal (Adjust Dynamically)
We don't enter trades with a initial dynamic Stop-Loss bigger than 12%.
Follow the tips from: https://docs.valhallaindicator.com/additional-info/Tips
⚠️ We advice you to create your own strategy according to your trading style, risk & capital management.
Averaging Levels
The Averaging Levels are also shown in the helper panel in case you like to Average out a position in case it doesn't hit your desired TP.

We recommend using a safety order volume scale of 2 to average positions.
This means that if your base order was of $100, your first safety order (SO1) should be of $200 and your SO2 of $400 and so on.
Averaging out positions in futures trading carries extremely high risk in volatile markets, always make sure to account for possible losses and use an adequate position size and risk management.
Last updated